Laser Cutting
It's already a good year for the small R&D team I work with: we've been lucky enough to get a laser cutter to experiment with! Ours is the 40W “fifth-generation” model from Full Spectrum Laser; it can cut up to 1/4 inch wood or plastic and can engrave anodized aluminum. It also features some slick software that acts as an ordinary Windows printer driver so that you can print directly from the software of your choice (for me in this context, usually Adobe Illustrator).
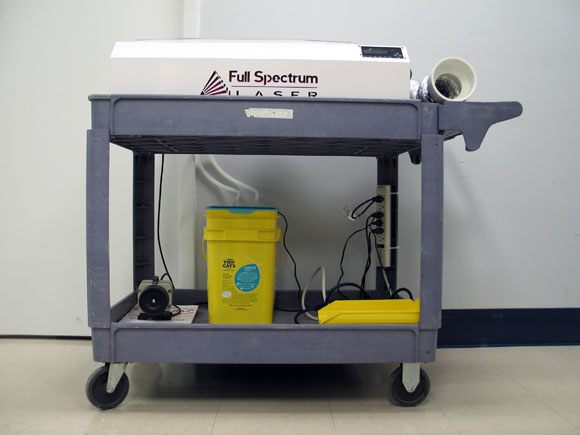
Completed laser setup
Like a lot of digital fabrication machines in the hobbyist end of the market, however, this device requires some setup to get it running. You'll want to mount the laser on a worktable or mobile cart big enough to support it and all the associated infrastructure. We equipped ours with a power strip for all the associated peripherals as well. On the left side of the photo is a small air compressor, supplied with our laser, that provides high-pressure air to the cutting head for purposes of blowing away anything that might otherwise adhere to the optics. This might also be useful in blowing out flames that may occur, which is definitely something to keep an eye on when laser cutting.

Cooling system
The carbon dioxide laser tube in this unit is designed to be cooled via a steady flow of distilled water. Full Spectrum supplied us with two lengths of tubing and a submersible pump to connect to inlet and outlet ports in the back of the laser; the user provides a bucket and the water. For our setup we used one of the buckets that kitty litter comes in, which is really an ideal reservoir for this since it comes with a two-part lid, so that you can drill holes for the inlet and outlet tubes in the more-permanent part of the lid, and leave the other lid openable for checking on the water supply. It's probably a good idea to keep any bucket you use covered, since the water and whatever else gets into it are going to be circulated directly inside the laser tube, and you don't want anything but pure water getting in there. Make sure you clean the bucket thoroughly before using it for this kind of thing too.
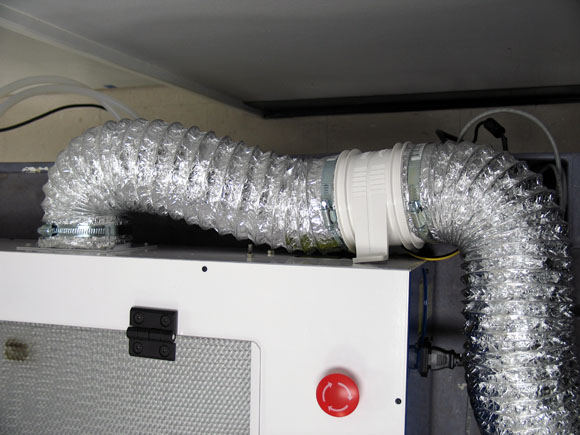
Exhaust system
Because laser cutters work by vaporizing whatever material you're using, it's necessary to do something about removing the fumes and smoke from the area—in fact, Full Spectrum specify an exhaust system of 60–100 CFM. There's a circular vent on the back of the cutter that's compatible with four-inch ductwork; we connected this to a slinky dryer vent in-line with a 12V axial blower intended for exhausting the bilge spaces of boats, which was conveniently available in four-inch diameter as well. The far end of the exhaust system we connect to a PVC-pipe ventilation port in the side of our building by means of an enlarging coupler.
Probably we should add a permanent carbon dioxide or halon fire extinguisher to our laser cart as well; we've been keeping one from off the wall near us when laser cutting, but it will be good to have one dedicated to this so that it's always handy.
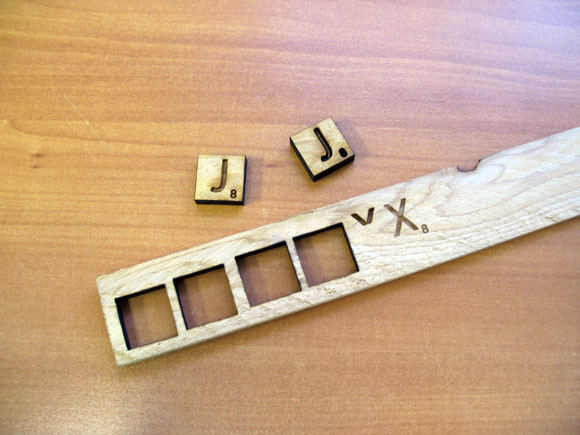
We immediately started looking for raw material nails to use with our laser cutter hammer and turned up some cedar shims of the type used to install windows. This was an ideal material to make some scrabble tiles out of!
I'm sure there will be more laser cutter projects on this site in coming months. Thanks for reading, and please visit again!